Simple Holography: The Easiest Way to Make Holograms
By T. H. Jeong, Raymond Ro, Riley Aumiller (Lake Forest College) and Misashi Iwasaki (Kyoto Institute of Technology) with contributions from Jeff Blythe (University of Cambridge), and edited by Alec Jeong. © 1996-2026 Integraf7. How to Make a Panoramic Transmission Hologram
Making a transmission hologram is just as easy as making a reflection hologram. The only difference is really in your initial set up the position of the laser, film plate, and object.
Transmission holograms offer many advantages over reflection holograms. For example: (1) the object or scene can be much bigger than the holographic plate; (2) when illuminated with the diode laser, the entire virtual image is sharp; (3) the real image can be projected onto a screen using a laser pointer; (4) it is more tolerant of vibration during recording, so that film, instead of the more expensive plates, can be used; and (5) two or more “channels” of independent images can be recorded on the same plate or film. For example, after the first exposure, turn the plate or film upside down and exposure again with a different object. Each exposure should be one-half the duration of one full exposure.
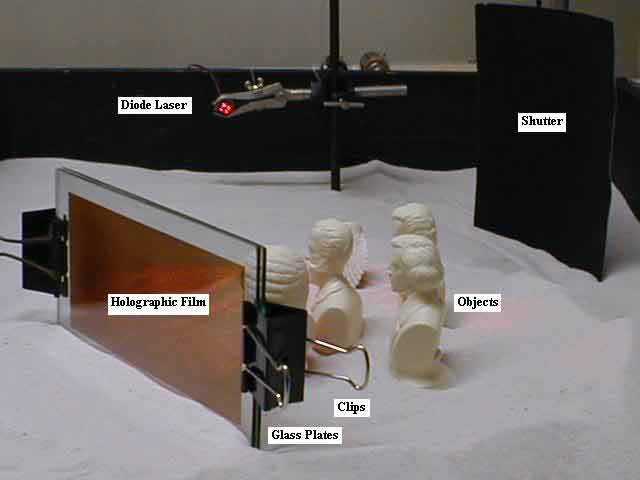
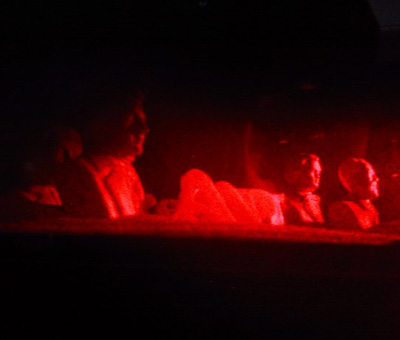
A "sandbox" system set up for recording a panoramic transmission hologram on a strip of film with approximate dimensions of 4"x5" (102mm x 127mm). The film is Slavich PFG-01 (which must be processed with JD-2 or JD-3) and can be cut (in a darkened room, of course)into any smaller sizes using scissors or paper cutter. One can also use a holographic plate. PFG-01 and PFG-03M both make great holograms, but PFG-01 is especially good for transmission holograms.
The film is clamped between two larger glass plates and stuck into the sand. One side of the spreading beam serves as reference beam and the rest illuminates the object(s). Since air is trapped inside the glass plates and escapes slowly, the film sandwich will have movement over several minutes. It is advisable to squeeze out the air by pressing the sandwich between two flat surfaces. Alternatively, just place the sandwich in position and wait 5 to 10 minutes before exposure. Cover the film and keep any stray light from fogging it during this time.
The exposure time is approximately 30 to 60 second (PFG-01). The processing procedure for the film, using JD-2 or JD-3, in accordance with instructions that accompany the kits.
For more details on making transmission holograms, see our article "How to Make Transmission Holograms".
8. Additional Tips
Use White Cardboard
The white cardboard placed behind the object is for observing the silhouette to ensure that the object is illuminated as evenly as possible. Assuming that this cardboard is opaque, you can use it as the "shutter" by moving it to a position between the laser and the object.
Laser Preparation
Make sure the laser has been warmed up for at least 5 minutes before any holograms are exposed. Minimize any disturbance to the laser (do not touch it or even allow moving air to cross it) which may cause the outputs to become unstable.
How to Observe Image in Finished Hologram
To view your hologram, you need to make sure you're using the correct light source from the appropriate angle. See our article "How to View Your First Hologram" for details.
Setting Up a Simple Classroom Lab
When setting up your lab in a classroom for multiple students, you may want into account some of the practical considerations such as how you set up your "assembly line" for students to expose and develop their holograms. See our article Teaching Holography in Classrooms" for details.
8. Conclusion
We have presented the simplest and least expensive method of making holograms. This type of project can be taught as art, craft, or science and technology in the elementary schools, before students have decided on their future occupation. Once interested, students will be induced to learn all the fundamental principles of optics and photonics: reflection, refraction, interference, diffraction, polarization, coherence, and scattering.